
Burl Wood Bowl Guide: How to Turn a Burl Like a Pro
15th Jul 2020
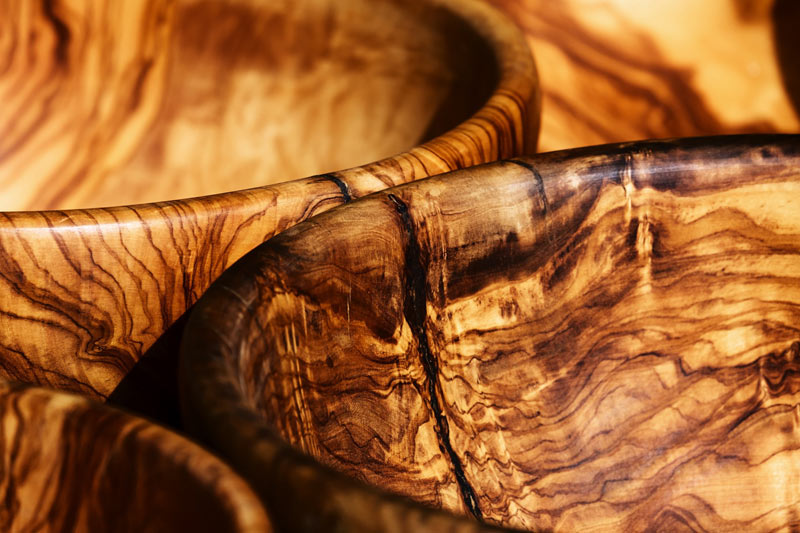
Burl wood, with its swirling grain patterns and unique spalting, makes one-of-a-kind art. Making a burl wood bowl captures the magic of burl, displaying the individual designs on a surface buffed to a shine. Due to burl's imperfections, it is important to mount and turn burl wood the right way.
Read on for a burl bowl guide that will help you create a stunning burl wood bowl.
Use Green Wood
Unlike other wood, burl wood shrinks evenly as it dries, but it can crack if you work with it after it dries. This process means that you may want to use green wood for your bowl.
Cut the Wood Into a Round
You need to cut the burl into a rounded shape before you mount it on the lathe. You can mark the circle by tracing a circle around the top of the burl with a compass, or tracing the outline of a circular template.
Mark the center on each end of the burl.
Mount the Wood
Attach a faceplate to the end that will be mounted on the headstock. You may also want to use the tailstock with a faceplate for safety since burls often contain decay or inclusions inside.
Line up the center of the back end with the tailstock, and tighten the tailstock. Spin the wood a few times by hand to make sure that the edges do not hit any of your equipment.
Start Turning
Slowly begin turning your wood. Remember that a large, uneven piece will need slow turning and small cuts as you smooth it out. You can increase the speed as the piece becomes more balanced.
Since burl wood is uneven, you may encounter fractures or projections. Watch for these, and do not let them grab your tool.
Shape the Bowl
When you are ready to shape your bowl, start with the area above the faceplate. Cut this until it is slightly larger than the diameter you plan for the base of the bowl.
Now you can start shaping the rest of the bowl. Consider the size of the burl and the direction of the grain as you plan, and see if the grain reveals an eye figure that you will want to highlight. Some artists leave bark on the exterior of the bowl for decoration, which gives each a unique appearance.
Start Your Interior
Once you have completed your exterior design, remove the bowl from the lathe. At this point you may want to remove the center with a bowl saver--not only will this save you time, but it will preserve the interior chunk to be turned into another piece. Since burl wood is both beautiful and expensive, it is a shame to turn it to shavings if you do not have to.
Attach the base of the bowl to the headstock, then begin turning. Be careful to not damage the rim, and leave some wood at the bottom of the bowl for support.
Find Wood for This Burl Bowl Guide
If you need a burl for this project, Global Wood Source can help you find the perfect piece. Contact us for information so that you can start following this burl bowl guide!
Global Wood Source is a family owned and operated lumber yard and mill specializing in exotic woods from around the world and rare domestics. We personally acquire and inspect each piece of log and timber obtained from forests and jungles worldwide.