
4 Steps to Prepare Your Burl for a Wood Project
28th May 2020
Woodworkers love creating art from burl wood because the patterns of swirling grain make every project uniquely beautiful. You can turn a burl into all sorts of visually exciting products, such as boxes, bowls, picture frames, nightstands, lamps, or sculptures.
A burl is basically a wart growing out from the side of a tree, so burl wood can be hard to come by. That means that when you find a piece of burl wood, you need to take good care of it as you prepare your burl.
Procure the Burl Wood
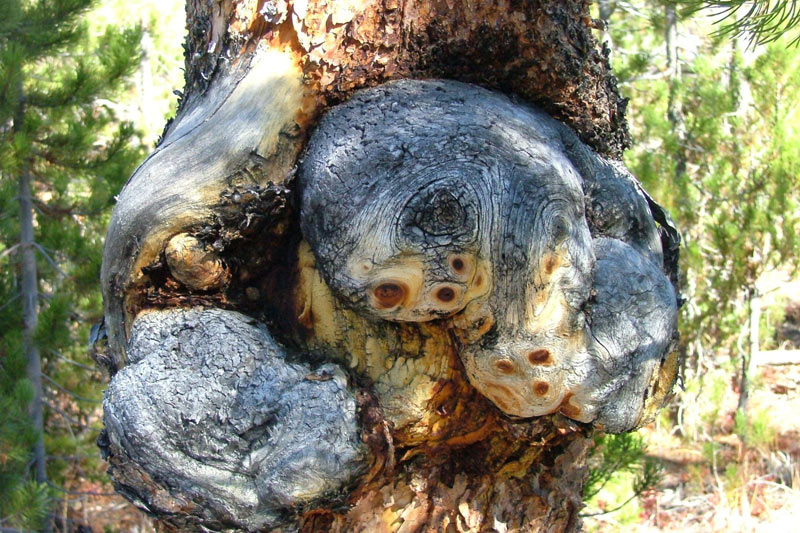
Burls can grow on the side of a tree trunk, in a ring around a tree trunk, or even in the roots of some trees and bushes. You can obtain burl wood from many different sources, including lumber companies, exotic wood shops, or even tree surgeons that come across them as they work.
Obtaining your wood from an ethical wood source is going to get you the highest quality product. Ethical sourcing not only protects the environment, but also allows for the procurement of significantly better products as they are carefully selected to ensure they meet all standards.
Seal the Wood
When the burl is cut from the tree, the ends should be sealed right away. This process keeps the burl from drying out too quickly, as it can crack and become hard to work with.
Prepare Your Burl for Cutting
Since each burl is different, inspect the burl to see what possibilities spring out at you. This inspection can help you choose the perfect size, use the most interesting grain patterns, and work around or highlight the imperfections. More practically, you will be able to decide whether to cut the wood into pieces for multiple projects. Several turners make cone separations to cut out a series of nested cones, which can be used to make individual bowls.
When you begin working, examine the burl to look for the grain. Some burls have a grain pattern of random swirls, but other burls, including maple burl, often contain an eye figure. In this case, you will see a different pattern depending on the direction you cut the burl : an up-and-down cut might reveal an eye figure on the cut board, while a sideways cut would reveal radiant lines.
Plan For Drying
Since wood burl grows in interlocking circles, it shrinks pretty evenly as it dries. This process means you can turn bowls with green wood. The finished project may need to dry for several months before you sand and oil it.
When cutting boards, cut them 25% thicker than you will need, which allows for any shrinkage that will happen as they dry.
Get Started
When you are considering a burl wood project, contact Global Wood Source . We sell all types of burl wood, including full burls, slabs, turning blocks, and pen blanks. We will help you prepare your burl and get started on your next artistic masterpiece.
Global Wood Source is a family owned and operated lumber yard and mill specializing in exotic woods from around the world and rare domestics. We personally acquire and inspect each piece of log and timber obtained from forests and jungles worldwide.